

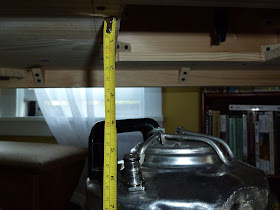
I was a bit worried about having enough room underneath to maneuver the kegs and have room for all of my attachments, but I ended up having about 5" which was plenty of room.
Here's a picture of it fully assembled.

Here it is after some staining and varnishing.

I got a fancy four valved manifold for the CO₂ line. This way, if one of the kegs got kicked I could shut off the gas so it wouldn't drain the keg if someone pulled the tap.

And here is is fully assembled.


Marygrace's mother had made me a skirt to go around the bottom of the kegerator, blue and white checkered. Unfortunately, I didn't manage to get any photos of it while it was set up. So next time I use it, I will post some pictures up here. I also designed this kegerator to be able to fit into the back hatch of my car, so if I ever have to transport it, I'll have to post those photos too.
Primary: Lite American Lager, Ginger Ale
Carbonating: Honey Dunkelweisen
Total for 2011: 60 Gallons
That turned out looking really nice. But did you insulate the lines at all? Looks like they travel a little ways without any refrigeration.
ReplyDeleteThe tower that I used was an old glycol cooled tower so it was completely insulated. Other than that, there was no insulation used. From the exit of the keg to the tower was only about 8". Also, this was designed and used as more of a jockey box, so the beer would not be in the lines for an extended period of time before it was poured.
ReplyDelete